| |
| about us |
| products & solutions |
| resources |
| examples |
| home |
| A simple focus stack for improving DOF in small photographic subjects |
Stacking is a technique where by multiple images, each with a slightly different focus, are combined by software to increase the depth of field of focus or the sharpness of an image. It is primarily used for astronomy, photomacrography or photomicrography. Why to stack When taking macro and micro pictures depth of field (DOF) decreases dramatically. You can compensate for this by decreasing your aperture size. However this presents its own problems. As the f number increases the sharpness in the resulting picture can actually decrease. This is because the light rays passing through the lens begin to diffract within the lens elements.
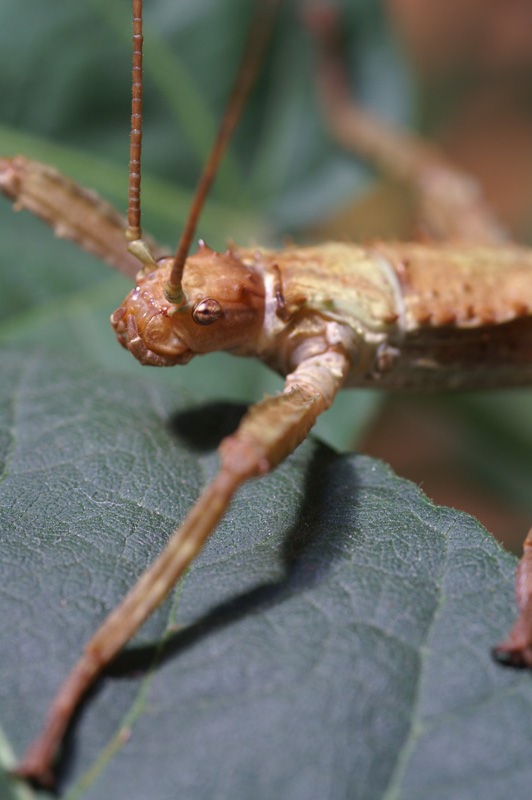
This is it is just a collage of the same object shot at different aperture settings at 1:1 magnification, you can see the image quality gets better and DOF increases all the way from f2.8 to about f16. After f22 even at this screen resolution you can see that the sharpness or image quality begins to get worse as the f number increases. When you go beyond 1:1 magnification the problem gets worse. If the shots had been taken with an extension tube or tele converter the point at which the image degrades would have been shifted to lower f numbers. Ideally we would be able to use a low f number but still keep the entire subject in focus. Stacking multiple images can help get a higher magnification and still stay in the sweet spot of whatever lens arrangement is being used. It can also allow precise control over the DOF in the picture. There are three main methods for stacking. The fist is the simplest but the hardest. You find a subject such as a fly and take some hand held pictures of it, first focusing on the nearest bit, then refocus somewhere in the middle and then on the furthest bit. This is the hardest method because it can be very hard to keep the camera still while refocusing. It has the advantage that you can use it any time in the field. The second method is the most common, where the camera is mounted on a tripod and refocused either by turning the lens focus ring or if mounted on a macro focusing rail by moving the camera forward by increments throughout the depth of the subject. The third method is only for studio work where the camera or microscope is mounted on fixed focusing rail or stand and moved forward by known increments throughout the depth of the subject. Usually this involves hundreds of combined pictures to achieve the finished result. In all methods the subject is required to remain stationary, this becomes increasingly difficult as the number of shots increases. How to stack, a short tutorial. There are several software applications that can be used, Helicon focus and CombineZ among others, here we will use CombineZ because it is free to use and regularly updated. Take your pictures, focusing at as even increments as possible throughout the subject in one direction, i.e. from front to back or from back to front. Copy them into a folder and keep the sequential numbering assigned by the camera. Here is an example of a living subject where each shot was fired at f 5.6 in natural light with the camera mounted on a tripod and refocused from the front to the back.
The low depth of feild of focus can clearly bee seen
Start CombineZ. Choose New from the file menu. Browse to the folder and select all the images. CombineZ will open a dialogue box and after some time it will open a new window with the last picture to have been loaded. If you have shot the subject from front to back then it is often a good idea to reverse the order of the pictures so as the software works out the focus of the objects towards the rear of the shot before those nearer the viewer. Do this by navigate to the stack menu and choose reverse order. To combine the images navigate to the macro menu and choose do stack. Another dialog box will appear and the various stages of the stacking procedure will be listed with associated time bars.
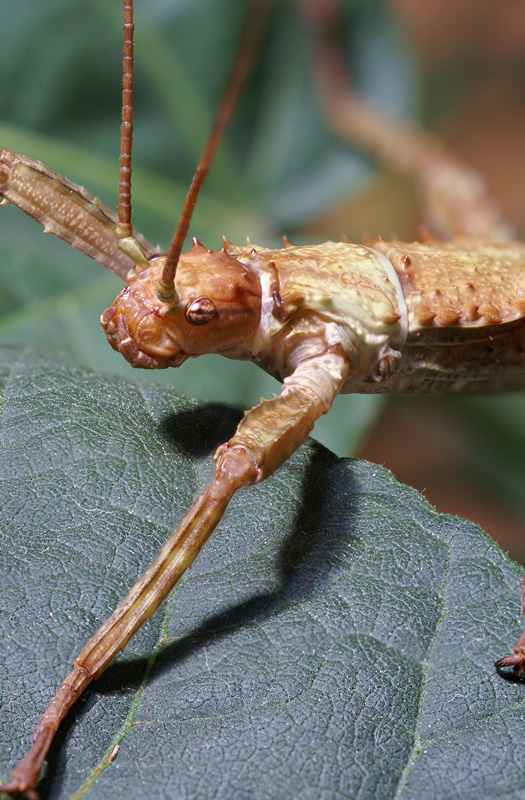
Once the process is completed a new window will appear with the finished stack. Sometimes out of focus areas from one image in the stack can make bits of the image bleed over into focused areas from another image. This can sometimes be reduced by running a weighted average correction. Navigate to the macro menu and choose weighted average correction.
To save your work navigate to menu and choose save frame/picture as, you may find that the edges of the picture have a strange mirroring effect, this is caused by combinez adjusting for changes in perspective and rotation produced when refocusing and should be cropped out in a photo editing program. Acknowledgements CombineZ Developed by Alen Hadley for allowing me to find more ways to play with my toys in the evenings. For further information feel free to contact Timothy Evison at timevison@hotmail.com |